• About
  • Mini-Courses ▼

    Rhetoric for Kids

    • ASL for Kids – ABC Signs
    • MathLibs™ – Free for Over 2 Decades!
    • Art for Kids – Elements of Design
    • Art for Kids – Principles of Design
    • Rhetoric for Kids
    • Fitness Songs for Kids + Positive Music
  • Grab+Go Activities ▼

    Sign Language For Kids

    • View All Lessons + Activities
    • Taking it Offline
    • Sign Language for Kids
    • Art for Kids: Fun Art Projects
    • Fun Math
    • Fun Science
    • Rhetoric
    • Creative Writing
    • Wellness for Kids
    • Coloring Sheets
  • MathLibs™
  • ASL Resources
  • Wellness
  • Shop
  • Contact
  • About
  • Mini-Courses ▼
    • ASL for Kids – ABC Signs
    • MathLibs™ – Free for Over 2 Decades!
    • Art for Kids – Elements of Design
    • Art for Kids – Principles of Design
    • Rhetoric for Kids
    • Fitness Songs for Kids + Positive Music
  • Grab+Go Activities ▼
    • View All Lessons + Activities
    • Taking it Offline
    • Sign Language for Kids
    • Art for Kids: Fun Art Projects
    • Fun Math
    • Fun Science
    • Rhetoric
    • Creative Writing
    • Wellness for Kids
    • Coloring Sheets
  • MathLibs™
  • ASL Resources
  • Wellness
  • Shop
  • Contact
Previous Next

7 Step Positive & Negative Space Art Project

Posted by: Jessika Jake

Positive and Negative Space Art Lesson

positive-negative-space-art-lesson

Today we’ll turn to Pixlr to create a cool and easy digital Positive & Negative Space project. You can use the same image we did, or you can use your own.

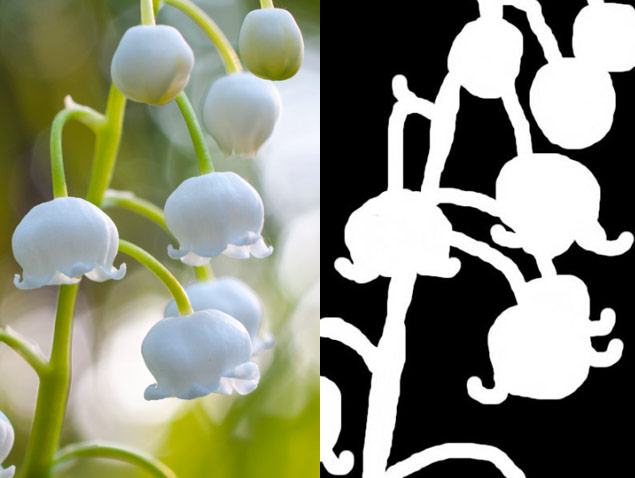
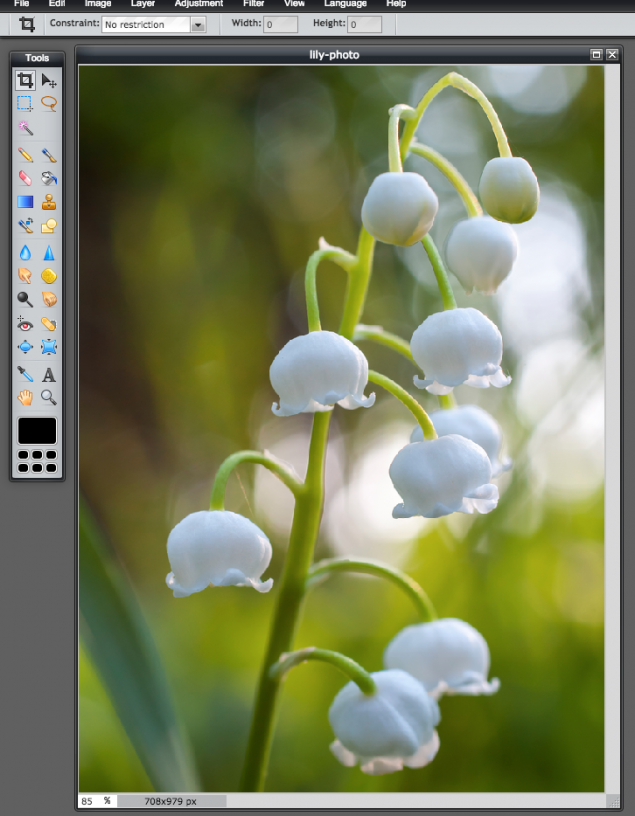
1. Choose Your Image

Right-click and save this image if you would like to use it:

positive and negative space art lesson middle school

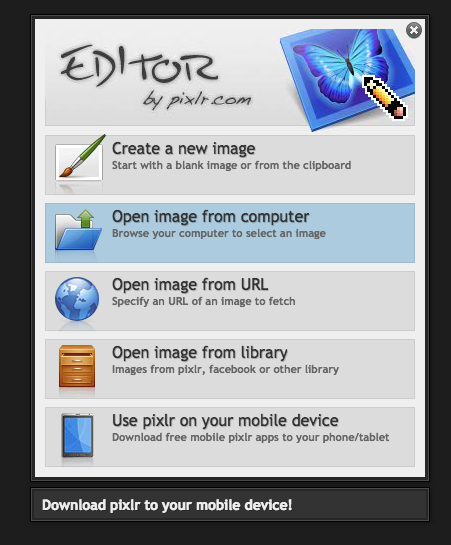
2. Open Your Image in Pixlr, it’s Free!

Head to Pixlr and open up your image:

positive and negative space art lesson elementary


04-pos-neg-project-for-kids-digital-open-pic

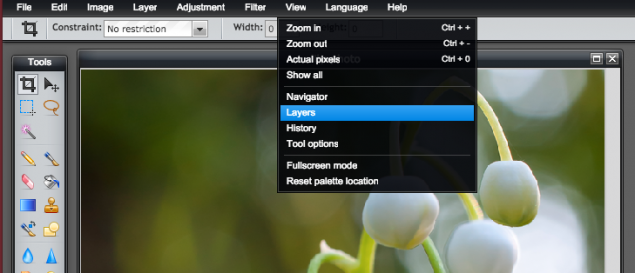
Note that you should see Layers, and if you don’t, you can turn those on:

06-see-layers


05-open-layers

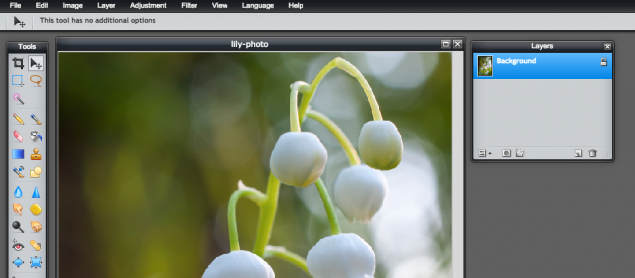
You currently only have a “background” layer, which is your image. In the next step we will add a new layer.
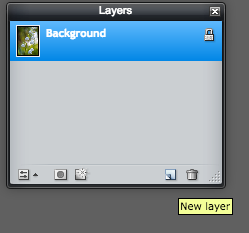
3. Add a New Layer

Click the New Layer button, which is to the left of the Trash Can in the Layers Palette:

07-bottom-corner-new-layer

08-to-left-of-trash-new-layer

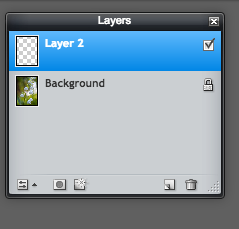
You now have a new layer to work with caller Layer 2:

09-your-new-layer

4. Make Your Layer Black

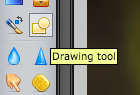
Draw a big black rectangle in Layer 2. To do so, head to the Drawing Tool at left (under Tools), and should already be set up to a rectangle with color set to black.

10-pick-drawing-tool

(pick your tool)

11-set-tool-to-rectangle

(check the Options Bar)

Go ahead and draw your rectangle:

13-draw-big-black-rectangle

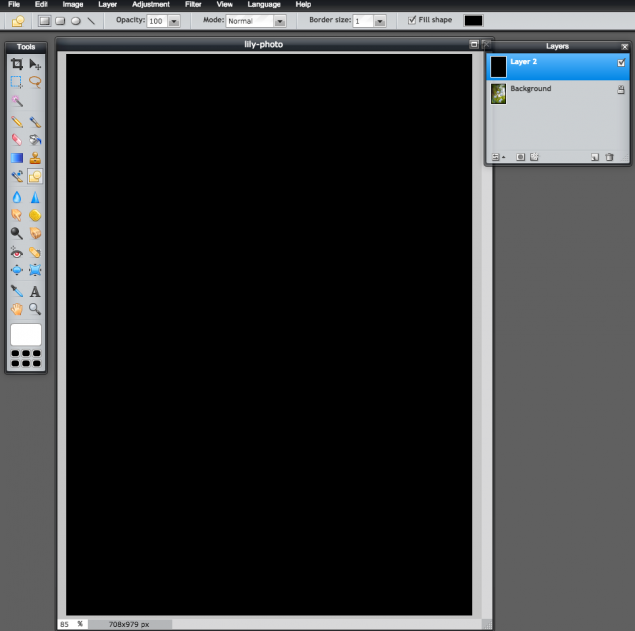
Note that Layer 2 is now all black!

14-add-new-layer

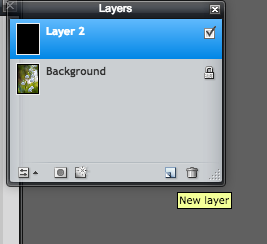
5. Add Another Layer

Add another New Layer and shut off (uncheck Layer 2):

15-your-new-layer

16-uncheck-black-layer

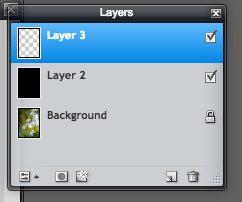
By unchecking the checkbox to the right of Layer 2, we are turning off it’s visibility, which will come in handy.

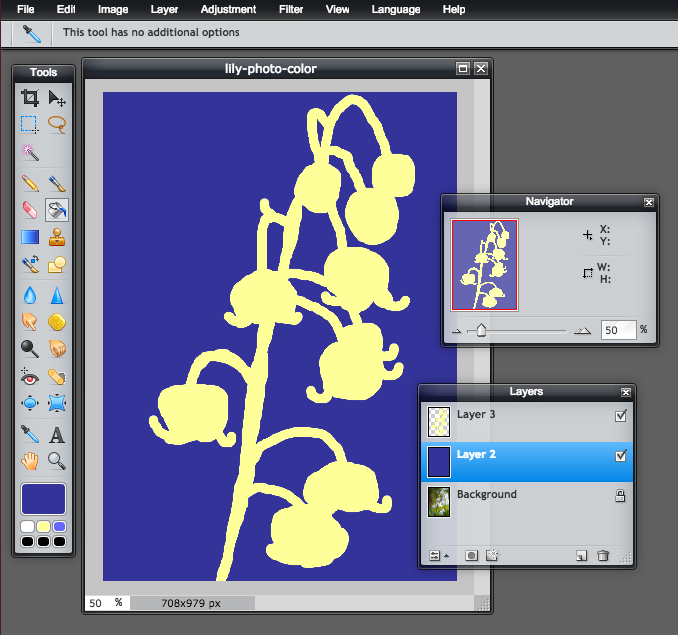
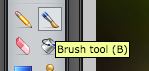
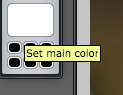
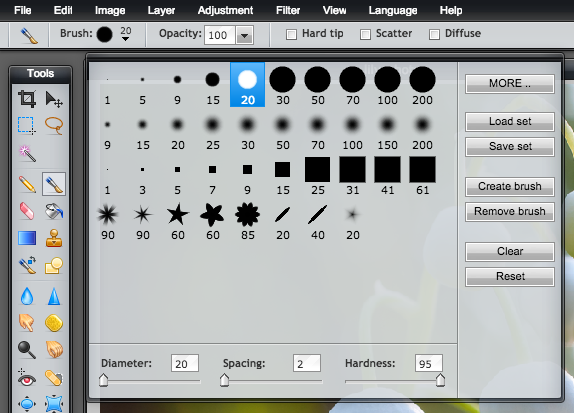
6. Paint With White in Your New Layer

From Tools, choose the Brush Tool. We will set the color to white (found at the bottom of your Tools) and we will go up to the Options Bar to pick out a hard-edged brush, and then start tracing over the lilies.

18-use-brush-tool

17-set-main-color

20-hard-edge-brush


21-start-painting

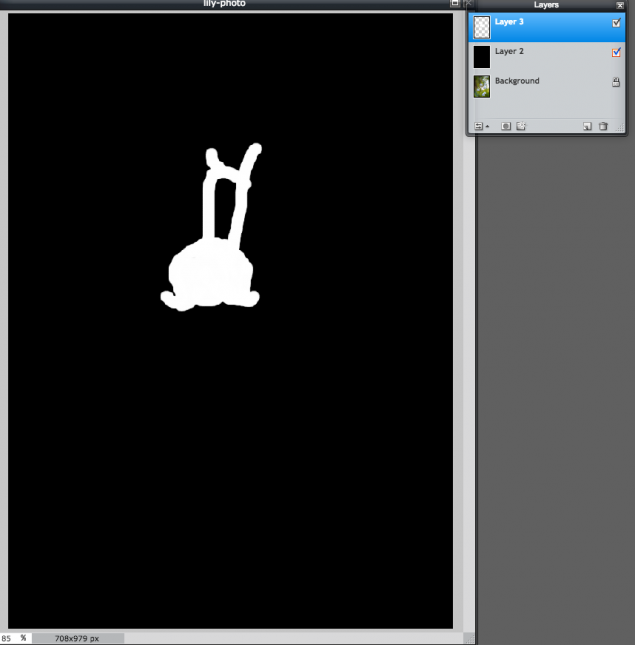
Note that if you are compelled to peek at your creation, you can turn Layer 2’s visibility back on for a second. Just be sure that you are painting in Layer 3 when you continue:

22-peeking

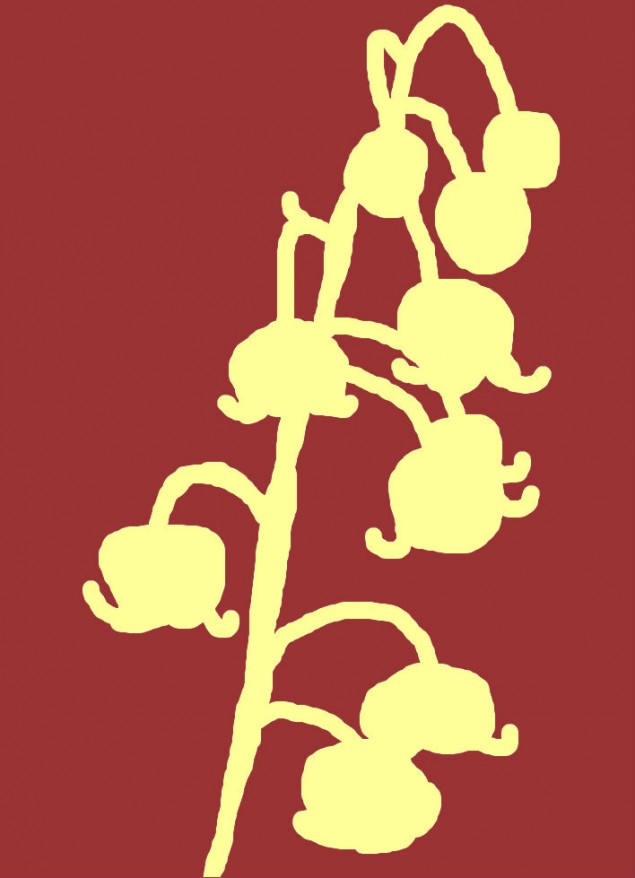
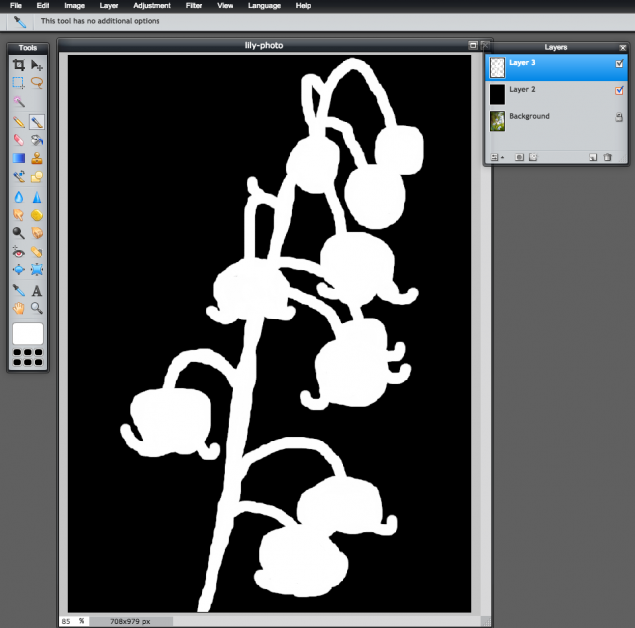
Keep painting until you are all done:

23-positive-negative-painting-b-w

As an artist you have the freedom to get fun with your painting. You do not have to trace the lilies exactly. I once very accurately drew a deformed blueberry and my classmates all noted that it looked odd. The overall composition was a bowl of blueberries and strawberries and I had done my best to exactly represent what I was seeing. My teacher then pointed out to me that I did not have to do that. So let yourself have fun. You don’t need to include ever bell and you can get carried away with the edges.
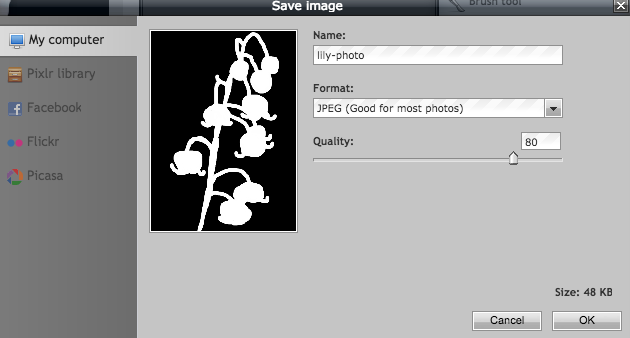
7. Save Your Work!

Great job! Now it’s time to save your work! The PNG orJPG options are both fine:

25-jpg-is-good


Want to play more? You can use the Paint Bucket tool with 66% tolerance and dump whatever colors you would like into your layers:

lily-photo-color

Share!
Tweet

Related Posts

Kaleidoscope Tiles

It is fun and simple to make your own Kaleidoscope Art, aptly called Kaleidoscope Tiles! Y ...
elements of design handout for kids

Lessons on Elements of Design

Check out our  lessons on Elements of Design for Kids to learn more (all topics have art a ...

Masks & Mirrors

Karen Gross, author of Trauma Doesn’t Stop at the School Door, came up with this project ...

Mom and ADHD Son Get Creative

Special thanks to Nicole Garcia, CMO of Most Craft for writing this post! I first connected wit ...

Comments are closed.

"Creative experiences to motivate children to be lifelong learners, express their creativity, think critically, spread positivity, be well, and just plain have fun!"


Trending Now: ASL for Kids | Art for Kids | Rhetoric for Kids | MathLibs® | Coloring

“Roll Out” Tightness #Relax #Recover #Rejuvenate

Browse by Category:

Art for Kids: Fun Art Projects Brain Healthy Activities Coding Coloring Sheets Communication Community Helpers Creative Writing Critical Thinking DIY Crafts Emotional Wellness Fun Math Learn Spanish Positive Music for Kids Quotes in Cursive (D'Nealian Script) Rhetoric Sign Language For Kids Social Emotional Learning Social Wellness Taking it Offline We Recommend Wellness for Kids

Subscribe:

Latest Posts

  • Havening to the Rescue
  • MathLibs™ Addition Quiz 1
  • MathLibs™ Multiplication Quiz 2
  • The Power of Play: Using Play to Foster Emotional Healing and Development in Kids

Find Us on Facebook

KidCourses.com
© 1992-2018 kidCourses.com | All Rights Reserved
  • Press + Praise
  • Terms
  • Privacy
  • A LoudGiraffe Project
  • Contact Us